How to Repair a Hole in a Wall
A little cricketing mishap that results in a small hole in the wall, we’ve all been there. Dents, dings and holes in walls are an unfortunate yet all too common event for families across Australia.
However small a hole in a wall is, it’s an eyesore.
But the hole doesn’t have to be very costly to repair or take a long time to get fixed; using a few tools you’ll probably have lying around the home and with a little effort, you can repair these holes yourself and get the wall looking like nothing ever happened. Here are our quick tips on how you can repair the hole in the wall.
Depending on the extent of the damage on the wall, the amount of restoration work will differ.
How to Repair Small Dents and Dings
Things you will need:
- Utility Knife
- Quick-drying spackle compound
- Sandpaper
Directions:
Using a utility knife, scrape any loose debris from the damaged area. Then apply a quick-drying spackle and press it tightly to the area (you may want to use disposable gloves whilst doing this as this compound may irritate some skin types and it makes the clean-up much easier). Following this, apply thin coats on the wall surface and allow it to dry for about 24 hours or thereabouts following the manufacturer’s instruction. When it is completely dry, sand the surface until smooth.
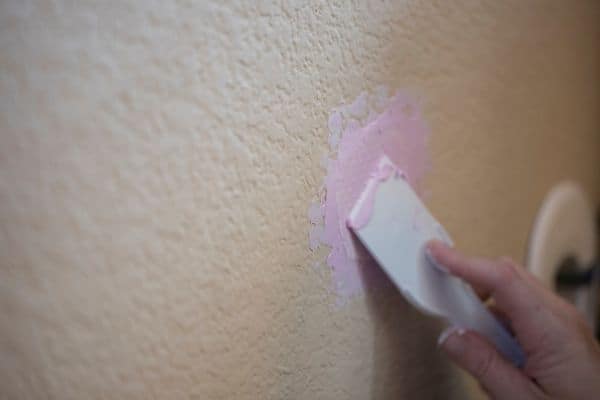
One little tip is to be sparing with the spackle that you use because although you want to make sure the area is covered, all the excess that you put on there will have to come off by sanding it which can be time-consuming and very messy.
How to Repair Small Holes
Things you will need:
- Wall repair kit which could include
- Self-adhesive wall patch
- Filling blade
- Sandpaper
- Quick-drying spackle compound
- Drywall knife
Directions:
For small holes, you can purchase a wall repair kit to get the job done fast and easy at most home improvement department stores. Place the self-adhesive wall patch over the small hole. Then using the filling blade, spread the spackle compound over the patch in a criss-cross pattern. To seal the edges, spread the spackle compound towards the outer edges of the patch area while increasing the pressure as you spread. Leave it to dry. If necessary, you can apply a second coat of a thin spackle compound. Finally, sand smooth the area to smoothen the surface.
How to Repair Medium Holes
Things you will need:
- Utility Knife
- Drywall saw
- Jointing compound
- Sandpaper
Directions:
If the holes are up to 6 inches in diameter, you may need to cut a piece of drywall (also known as plasterboard or gyprock) to replace it. Measure the piece of drywall allowing 2 inches in width and height larger than the area to be repaired.
Cut about an inch of the back of the drywall around the side using a utility knife. Carefully snap off the gypsum and leave the paper backing intact. Then trace the drywall over the hole without including the paper border. Check the hole for electrical wires first and turn off any power if you are unsure. Then cut out the traced square using a drywall saw. Apply the jointing compound under the paper border and along the sides of the gypsum too. Then fit the gypsum into the square hole and press the top of the paper border to seal it.

Spread a thin coat of the jointing compound to cover the entire patch until the edges are no longer visible. You can apply a thin coating twice for better results. Remember to allow it to dry before applying the second coat. Lastly, sand smooth the surface of the patch.
Now that you’ve read this guide you’ll feel equipped to able to repair small or medium-sized holes and dents on your walls without hiring a professional plasterer saving you money to spend on other important things. Plus it can be a great little project to do with your kids and you can even use it as a teaching opportunity (there are consequences for silly behaviour).
If the damage to your walls is significant you may want to consider contacting a professional plastering service to ensure the repair blends in seamlessly with your wall.