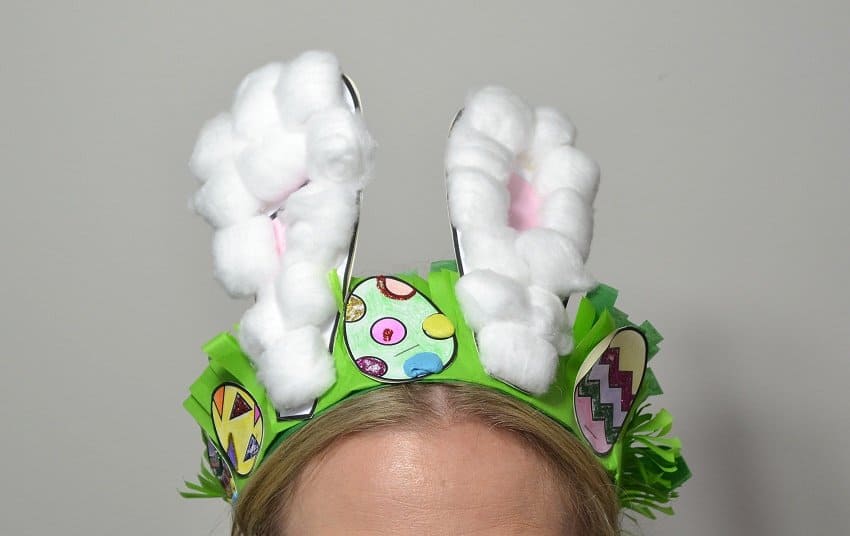
DIY Easter Bonnet Template
Download the free Easter Bonnet Template and then follow these instructions to make an easy Easter Bonnet for your Easter Parade.
MATERIALS NEEDED:
- Bostik print out template (A3)
- Bostik Blu Stik
- Bostik Clag Kids PVA
- Bostik Glitter Glue Classic
- Stapler
- Hole puncher
- Coloured markers/pencils
- Light green tissue paper
- Dark green tissue paper
- Elastic string
- 1 x pink pom pom
- 4 x white cotton balls
- White pipe cleaners
- 1 x popsicle stick
METHOD:
STEP 1: Measure around the head of your child and cut out the headband strip to size. Staple the ends together.
STEP 2: Print out the templates provided and cut them out. Found here.
STEP 3: Use Bostik Blu Stik to stick the pieces onto the cardboard paper and cut out again.
STEP 4: Use Bostik Glitter Glue Classic, coloured markers or pencils to decorate the eggs and bow tie.
STEP 5: Colour the inside of the rabbit ears with pink markers or pencils.
STEP 6: Use Bostik Clag Kids PVA to glue down the white cotton balls on the edge of the ears.
STEP 7: Cut fringes along the green tissue paper. Be sure to keep one end intact. Use Bostik Blu Stik to glue down the tissue paper around the headband.
STEP 8: Secure the rabbit ears and eggs to the headband with a stapler.
STEP 9: Use a hole puncher to punch two holes centred on the bunny’s bow.
STEP 10: Cut the elastic to the required length and thread it through the holes. Secure with a knot.
STEP 9: Use Bostik Craft PVA to stick the pink pom pom at the tip of the popsicle stick.
STEP 10: Twist two pipe cleaners around the popsicle stick. Make sure you have them sticking out both ways to make your Easter whiskers!
Bostik products are available online.