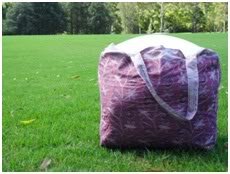
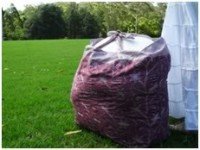
Make a Big Bag
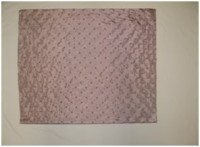
This bag is so useful. It is big and strong and washable. The bag in the photos is holding 3 pillows and I could have squashed in another if I really needed to. The handles are long enough to tie together when the bag is full. I have used this basic design to make over night bags, beach bags, tool bags, sleeping bag holder and smaller versions as a shopping bag and a baby bag. I hope you enjoy making one, or two or three or more.

Materials
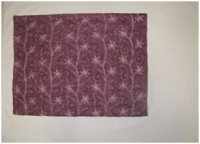
1.5m of main fabric
1.5m of contrast fabric
cotton
zipper – for optional pocket
pen for marking fabric (not felt tip or texta as these will run)
Cutting
Main fabric
Cut rectangle for bag; 55cm (height) by 70cm (width) on the fold.
Contrast Fabric
Cut rectangle for bag; 63 cm (height) by 70 cm (width) on the fold.
 Cut 2 rectangles for handles; 12 cm by 70cm
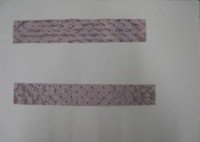
Cut 2 rectangles for contrast band; 10 cm by 70cm
To Make
1 cm seam allowance
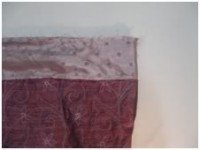
- Sew side seams on contrast fabric. Press seam to one side, i.e. a closed seam. Press a crease along the bottom of the bag.
- Flatten the corner of the bag into a triangle, matching the side seam and the crease along the bottom of the bag. This is done by placing the point of the pin on the side seam and checking on the back to see if it goes through the crease. Move the crease across until the pin goes through the both the side seam and the crease.

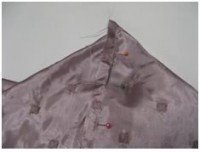
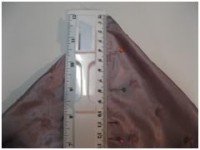
- Measure down 11 cm from the top corner of the triangle. Draw a mark.
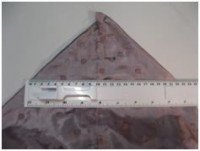 Place your ruler on this mark with the 11cm mark on the seam. Move the ruler so that the 0 mark and the 22 cm mark are on the edges of the material. This will make the corner of the bag. If you have lined up the seam and the crease well, you will be able to line up the 0 and the 22cm marks.
- Repeat steps 2 to 4 for the other corner of the bag.
- If desired, attach an internal pocket. See instructions below.
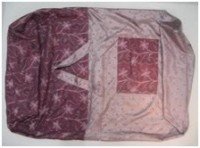
- Sew side seams on main fabric. Press seam to one side i.e a closed seam. Press a crease along the bottom of the bag.
- Make corner seams as for the contrast fabric, i.e. steps 2 to 4.
- If desired, attach external decorations (no instructions given).
 Sew side seams of contrast band.
- Attach contrast band to main fabric bag, matching side seams.
- Press seam down towards the main fabric.
- Topstitch.
- Fold handles lengthwise but do not press. Sew seam.
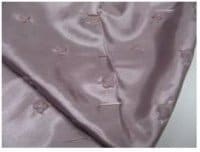
- Turn right side out. Press so that the seam is in the middle (not on the side) of the handle and topstitch. (The seam is not centred in the photo here because I centred the pattern instead.)
- With the seam of the handle facing towards you, pin the handle onto the right side of the contrast band. Place the outside edge of the handle 18 cm from the side seam. Repeat for other end of the handle, making sure there are no twists.
 Repeat for the second handle on the other side of the bag.
- Turn this main fabric bag wrong side out so that the handles are tucked inside.
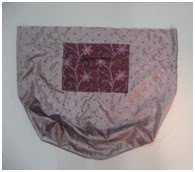
- Turn the lining right side out. Place lining inside the main fabric bag, matching side seams.
- Sew the seam leaving a 10 cm opening.
- Pull bag right side out through the opening.
- Press seam.
- Push lining inside main fabric bag.
- Topstitch seam, closing the hole.
Optional Pocket.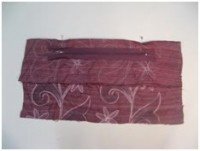
1. Cut a rectangle from main fabric 32 cm wide by 33 cm high. Cut into two rectangles by cutting along a line 10 cm from the top.
2. Place 20 cm zipper in the middle. Mark ends of zipper with pins.
1. Sew from the pins towards the outer edges using a 1.5cm seam. Zig zag raw edges.
2. Press seam open.
 3. With right side facing up, centre zipper under the opening. Pin and sew both sides of the zipper with a zipper foot.
1. Press seam allowance around outside of pocket.
2. Sew to the right side of the bag lining, 7 cm from the top
I hope you enjoy making your big bags.
 This crafty idea was brought to you by Alison Johns who is the creator of the Ready2Roll Pregnancy Pillow. Alison developed the double sided support pillow after stuggling to sleep while pregnant with her fourth child. Her midwife suggested she sell the pillows and so after testing them thoroughly throughout her 5th (and final) pregnancy, she now sells her Ready2Roll Pregnancy pillows on her website. The website also has a video showing you how the pillow works.